Removing old paint from cabinets can be a useful step when updating a kitchen, bathroom, built-in storage, or other painted cabinetry. However, cabinet surfaces can be more delicate than they appear. Aggressive scraping, excessive sanding, or the wrong chemical stripper can damage wood, veneer, MDF, laminate, or the existing finish underneath.
If your goal is to remove paint from cabinets without creating additional repairs, the process should begin with identifying the cabinet material and testing the removal method. The right approach is usually controlled rather than aggressive.
In some situations, you may not need to remove every layer of paint. If the existing coating is firmly attached, proper cleaning, sanding, repair, and priming may provide a suitable surface for repainting.
This guide explains how to remove paint from cabinets while reducing the risk of scratches, gouges, veneer damage, and other surface problems.
Can You Remove Paint from Cabinets Without Damaging Them?
Yes, paint can often be removed from cabinets without significant damage, but the method depends on the cabinet material and the type and condition of the existing paint.
Solid wood generally provides more flexibility during paint removal than thin wood veneer. MDF and laminate surfaces require different considerations because aggressive scraping or sanding can expose or damage the underlying material.
Before starting, examine the cabinet carefully. Look for peeling paint, cracks, chips, water damage, loose veneer, or areas where the existing finish is already separating.
The purpose of paint removal is not simply to make the cabinet completely bare. It is to create a stable, clean surface that can be repaired and properly prepared for the next finish.
What Should You Check Before Removing Cabinet Paint?
Identify the Cabinet Material
Knowing what your cabinets are made from is one of the most important steps.
Common cabinet materials include:
- Solid wood
- Wood veneer
- MDF
- Plywood
- Laminate
- Other engineered materials
Solid wood can generally tolerate controlled scraping and sanding. Veneer requires more care because the decorative wood layer can be relatively thin. MDF can become damaged if excessive moisture or aggressive sanding reaches the substrate.
If you cannot identify the material, check an unfinished edge, hinge area, or another inconspicuous location.
Check the Condition of the Existing Paint
Examine whether the paint is:
- Firmly bonded
- Peeling
- Cracking
- Chipping
- Bubbling
- Flaking
- Covered with several previous layers
If only a few areas are peeling, complete paint removal may not be necessary. Loose material can often be removed and the remaining coating properly prepared.
However, if several layers are failing, removing more of the existing coating may be appropriate before refinishing.
Determine Whether There Are Multiple Paint Layers
Older cabinets may have been painted more than once. Multiple layers can make sanding inefficient because removing everything mechanically may require significant time and pressure.
A suitable paint stripper may soften several layers at once, but it should always be tested on a small area first.
Tools and Materials for Safe Paint Removal
Having the correct equipment helps prevent unnecessary damage.
| Tool or Material | Main Purpose |
|---|---|
| Screwdriver or drill | Removing doors and hardware |
| Drop cloth | Protecting floors and nearby surfaces |
| Painter’s tape | Protecting surrounding areas |
| Cleaning solution | Removing grease and residue |
| Protective gloves | Protecting hands |
| Safety glasses | Protecting eyes |
| Appropriate respirator or mask | Reducing exposure to dust or fumes |
| Plastic scraper | Removing softened paint |
| Paint stripper | Softening compatible paint coatings |
| Sandpaper | Smoothing remaining coating |
| Sanding block | Providing controlled hand sanding |
| Clean cloths | Removing residue and dust |
| Small test container | Testing the selected removal method |
Chemical products should be used according to their manufacturer’s instructions. Proper ventilation is especially important when using products that produce fumes.
How to Remove Paint from Cabinets Step by Step
1. Remove Cabinet Doors and Hardware
If possible, remove cabinet doors and drawers before starting.
Take off knobs, pulls, hinges, and other hardware. Keep the hardware organized and label each door so everything can be returned to its original position.
Working on a flat surface gives you better control over scraping and sanding. It also reduces the chance of accidentally damaging countertops, walls, or appliances.
Place doors on a protected, stable work surface.
For cabinet boxes that cannot be removed, cover surrounding surfaces with drop cloths and painter’s tape.
2. Clean the Cabinet Surface
Kitchen and bathroom cabinets can collect grease, cooking residue, dust, soap deposits, and cleaning products.
Before trying to remove paint, clean the surface thoroughly. A dirty surface can make paint removal less predictable and can interfere with later primer and paint adhesion.
Allow the cabinets to dry completely before proceeding.
Cleaning is especially important when using a chemical stripper because grease and other contaminants can interfere with the product’s ability to contact the coating evenly.
3. Test the Paint Removal Method
Never begin by treating the entire cabinet.
Select a small, hidden area and test the proposed method. This could be the back of a door, an inside edge, or another inconspicuous location.
Observe:
- How easily the paint softens
- Whether the coating lifts cleanly
- Whether the underlying surface changes
- Whether the material becomes soft or damaged
- Whether the paint stripper leaves residue
If the test causes damage, stop and select another method.
A few minutes spent testing can prevent extensive repairs later.
4. Choose a Suitable Paint Removal Method
There is no universal method for every cabinet.
Depending on the surface, you may use:
- Manual scraping
- Chemical paint stripping
- Controlled sanding
- A combination of these methods
The safest approach is generally the least aggressive method that effectively removes the unwanted coating.
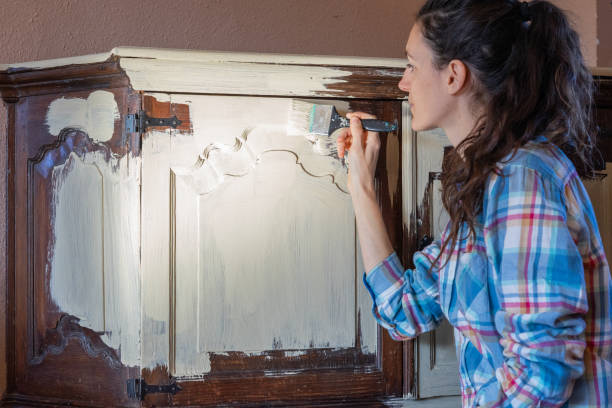
5. Apply Paint Stripper When Appropriate
A compatible paint stripper can be useful when cabinets have several layers of old paint.
Apply the product according to the manufacturer’s instructions. Do not assume that leaving the product on for a longer period will produce better results.
Once the coating becomes soft or begins to lift, use a plastic scraper to carefully remove it.
Work in manageable sections rather than applying stripper to an entire kitchen at once.
Always follow the product’s safety requirements, including ventilation and protective equipment.
6. Scrape the Softened Paint
After the paint has softened, use a plastic scraper to lift the coating.
Hold the scraper at a controlled angle and avoid forcing it into the cabinet surface.
If the paint does not release easily, avoid increasing pressure immediately. The product may need additional time according to its instructions, or the selected removal method may not be suitable for that particular coating.
Sharp metal tools can create gouges, particularly on softer wood and engineered materials. A plastic scraper can provide more control for many cabinet surfaces.
7. Sand Remaining Paint Carefully
After removing the bulk of the coating, sanding can help smooth remaining paint and prepare the cabinet for refinishing.
Use controlled pressure and appropriate sandpaper. Avoid repeatedly sanding one area because excessive sanding can create low spots, change edges, or expose underlying material.
Extra caution is needed with veneer. The objective is to prepare the surface, not necessarily to sand through every trace of the previous finish.
For larger projects, a sanding block or suitable power sander may be useful, but power tools should be used carefully around cabinet profiles, edges, and corners.
8. Remove Dust and Residue
Once paint removal and sanding are complete, clean away dust and residue.
Use an appropriate cleaning method for the cabinet material and allow the surface to dry fully.
Inspect the cabinets under good lighting. Small areas of remaining paint are easier to identify before primer is applied.
9. Repair Surface Damage
Paint removal may reveal imperfections that were hidden beneath the old coating.
Check for:
- Scratches
- Gouges
- Cracks
- Dents
- Loose veneer
- Damaged edges
- Water-related deterioration
Repair appropriate imperfections before priming.
If a cabinet has significant structural damage, replacing or repairing the affected component may be more appropriate than simply applying another coating.
Best Paint Removal Methods by Cabinet Material
The appropriate method varies considerably depending on what the cabinets are made from.
| Cabinet Material | Suitable Approach | Main Risk |
|---|---|---|
| Solid wood | Controlled scraping, stripping, and sanding | Gouges and excessive sanding |
| Wood veneer | Gentle scraping and light sanding | Sanding through veneer |
| MDF | Careful surface preparation | Moisture and substrate damage |
| Plywood | Controlled stripping and sanding | Damaging thin surface layers |
| Laminate | Compatible surface preparation | Damaging the laminate layer |
| Painted engineered cabinets | Test first, then controlled preparation | Exposing the substrate |
This is why identifying the cabinet material before beginning cabinet paint removal is important.
What Is the Safest Way to Remove Paint from Wood Cabinets?
For wood cabinets, the safest approach is usually controlled preparation rather than aggressive stripping.
Start by cleaning the surface. Test a small area, then determine whether scraping, chemical stripping, sanding, or a combination is appropriate.
If a chemical stripper is used, select one compatible with the existing coating and cabinet material. Once the paint softens, scrape it carefully rather than digging into the wood.
Afterward, use controlled sanding to smooth the surface.
The goal should be to preserve the shape, edges, profiles, and natural structure of the cabinet.
How Do You Remove Paint from Veneer Cabinets?
Veneer cabinets require extra caution because the visible wood layer may be thin.
Avoid aggressive sanding and deep scraping. Instead, focus on removing loose or unwanted coating while preserving the veneer underneath.
A small test area is particularly important. If the veneer begins to change color, lift, crack, or expose the substrate, stop the process.
When veneer is already damaged or separating, professional assessment may be more appropriate than continuing with DIY paint removal.
Common Mistakes When Removing Paint from Cabinets
Using Too Much Pressure
If paint does not come off easily, forcing a scraper into the surface can cause permanent damage.
Use controlled pressure and reassess the removal method instead.
Skipping the Test Area
A method that works on one cabinet material may damage another. Always test an inconspicuous area before proceeding across the entire surface.
Sanding Until the Cabinet Is Completely Bare
Complete removal is not always necessary. Excessive sanding can damage edges, profiles, veneer, and substrates.
Ignoring Grease and Dirt
Paint removal should begin with a clean surface. Residue can interfere with both stripping and subsequent refinishing.
Using the Wrong Chemical Product
Not every paint stripper is suitable for every cabinet surface or coating. Read the manufacturer’s instructions carefully.
Rushing the Process
Trying to finish quickly can lead to aggressive scraping, excessive sanding, or insufficient cleaning. Cabinet preparation often requires several controlled stages.
Do You Need to Remove All Paint Before Repainting Cabinets?
No. In many situations, complete paint removal is unnecessary.
If the existing coating is firmly attached, the cabinets may only require:
- Thorough cleaning
- Light sanding or scuffing
- Surface repairs
- Dust removal
- Compatible primer
- New cabinet paint
Complete stripping may make more sense when the existing paint is extensively peeling, incompatible with the planned finish, heavily built up, or otherwise unsuitable for proper preparation.
The condition of the existing coating should determine the approach.
When Should You Consider Professional Cabinet Refinishing?
Some cabinet projects are relatively straightforward, but professional assistance can be useful when the project involves extensive paint buildup, delicate veneer, complicated cabinet profiles, large kitchens, or uncertain surface conditions.
A professional can assess whether the cabinets should be completely stripped or whether preparation and refinishing would be more appropriate.
Bolden’s Painting Co. provides cabinet refinishing services for kitchen, bathroom, and built-in cabinets. Its cabinet refinishing process includes removing and labeling doors and drawers, cleaning and degreasing surfaces, sanding, filling imperfections, priming, and applying the selected finish. Bolden’s Painting also provides residential and commercial painting services in the Wichita area.
For homeowners considering cabinet updates, the condition of the existing cabinets is an important factor when deciding between stripping, refinishing, repainting, or replacement.
Conclusion
Learning how to remove paint from cabinets without damaging the surface requires patience and the right preparation method. Start by identifying the cabinet material, cleaning the surface, and testing your selected technique in an inconspicuous area.
For solid wood, controlled scraping, suitable stripping products, and careful sanding can be effective. Veneer, MDF, laminate, and other manufactured surfaces may require more specialized preparation. Avoid excessive force, aggressive sanding, and chemical products that are not suitable for the cabinet material.
It is also important to remember that completely removing every layer of paint is not always necessary. When an existing coating is stable, proper cleaning, surface preparation, repairs, and priming may provide a more practical route to repainting.
For homeowners in Wichita and surrounding communities, Bolden’s Painting Co. provides cabinet refinishing along with residential and commercial painting services. If you are unsure whether your cabinets should be stripped, repaired, refinished, or repainted, you can contact us to discuss the condition of the existing surface and the appropriate next step.
Frequently Asked Questions
What is the best way to remove paint from cabinets?
The best method depends on the cabinet material and existing coating. Controlled scraping, compatible paint stripper, and careful sanding can be used individually or together when appropriate.
Can you remove paint from cabinets without sanding?
Yes, some paint can be removed using a compatible chemical stripper and careful scraping. However, light sanding may still be useful for smoothing the surface and preparing it for primer.
Can I use a paint stripper on wood cabinets?
A compatible paint stripper can be used on some wood cabinets. Always test the product in a small hidden area first and follow the manufacturer’s safety and application instructions.
How do you remove paint from cabinets without damaging wood?
Use controlled scraping, avoid excessive pressure, test the removal method first, and use careful sanding. The objective is to remove the coating without gouging or unnecessarily thinning the wood.
How do you remove paint from veneer cabinets?
Veneer requires gentle preparation because the wood layer can be thin. Avoid aggressive sanding and scraping, and test your selected method in an inconspicuous area before treating the entire cabinet.
Should I strip my cabinets before repainting?
Not necessarily. If the existing paint is firmly attached, cleaning, light sanding, repairs, and proper priming may be sufficient. Extensive stripping may be appropriate when the existing coating is failing or unsuitable for repainting.
How long does cabinet paint removal take?
The time varies according to the number of cabinets, number of paint layers, cabinet material, paint type, and removal method. A small project with one coating may be much faster than a kitchen with multiple old layers.
Is it better to refinish or replace painted cabinets?
If the cabinets are structurally sound, refinishing may be an option instead of replacing them. If the cabinets have significant structural, water, or substrate damage, replacement may be worth considering.
Can old paint damage kitchen cabinets?
Peeling or failing paint can expose the underlying material to moisture and everyday wear. However, the condition of the cabinet itself should be evaluated before deciding whether stripping, repairing, refinishing, or replacement is necessary.
What should I do after removing cabinet paint?
Clean the surface, repair imperfections, remove dust, and prepare the cabinet with a compatible primer before applying a new finish. Follow the coating manufacturer’s instructions for drying and curing.